Selasa, 25 Oktober 2011

Add an Affiliate Banner to Blogger Sidebar


A lot of people want to make money from their blog and for this reason want to learn how to insert affiliate banners into their Blogger Blogspot blog. In this Blogger tutorial which is the first of a series I will show you how to place a banner in the sidebar of your Blogger blog (Blogspot blog).

Even if you are new to Blogger and have very little technical knowledge this tutorial is still suitable for you as I will guide you through every step in the process of adding a banner ad to the sidebar of your Blogger blog.

Banner Advertising is an Effective Way to Make Money from a Blogger Blog - Here is a cluster of 3 125x125 banner ads
How to Add an Affiliate Banner To the Sidebar of Your Blog
It is relatively easy to add an affiliate banner to the sidebar of your blog.

1. Sign up with an affiliate marketing program like Commission Junction and select your merchant

2. Decide on the size of the merchant banner or banners you wish to display in your sidebar making sure that whatever you choose will fit into the sidebar space otherwise your banner ad may not display properly on your blog. Typical sizes suitable for sidebars are:

  • small rectangular banners 125x90 or 125x125
  • square banners 200x200 (if space allows)
  • short vertical banners 120x200
  • long column style skyscraper bnnners 120x600 or 160x600

3. Choose your banner and you will be presented with the merchant code to display the banner. Right click to select all and right click again to copy the code to the clipboard of your computer

4. In a new window login to Blogger and navigate to Design > Page Elements

5. Click on Add a Gadget in the sidebar. If you are using a customized template you may have 2 different sidebars so decide which you want the banner ad to display in.

6. Select HTML/Javascript widget from the Add a Gadget menu

7. Place your mouse in the content box of the Configure HTML/Javascript widget and right click. Choose paste to insert the merchant code of your banner ad into the content box

8. In the title box add a Title like Sponsored Ads if you wish otherwise leave it blank
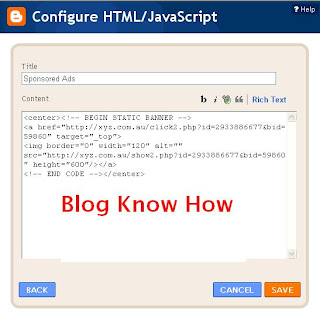
Paste Merchant Code of your banner ad into Configure HTML/Javascript content box
9. Click on Save

10. Using Blogger's drag and drop feature to pick up your new HTML/Javascript widget and position it where you want your banner ad to show up in your sidebar.

11. Save your layout

12. Click on View Blog to see you new banner ad in action.


Add Space Between Your Banner Ads
If you want more space between your banner ad and the previous widget you can add <p> before the code your inserted in the HTML/Javascript widget. If you need even more add another <p>

To Center Your Advertising Banner
If you want to center your banner ad insert <center> before the merchant code and </center> after it.

Add More Than One Banner
If you want to add more than one banner ad to the same widget you can just by pasting the code for the second banner ad below the first lot of code. If you want some white space between the banners ads insert <p> between each lot of code.

Troubleshooting

Your Banner Does Not Display
Your banner ad should appear right away. If your banner ad doesn't display at all then there is a problem with the widget you have just created. Retrace your steps making sure you have got all the code.

Only Placeholder for the Banner Displays
If you see a placeholder but no ad displays then the affiliate website may be off line or there is a problem with the code in some way. Go back and make sure you copied all of the code correctly


In this Blogger tutorial you have learned how to add an affiliate marketing advertisement banner to the sidebar of your Blogger blog (Blogspot blog) and about some common problems that you may encounter. In my next tutorials on banner advertising I will show you how to place a banner in a variety of other spots on your blog including the footer, above the first post and in the header. Why not bookmark this site so you can return easily?

Kamis, 29 September 2011

Windows 8 Pre-Beta ISO Download Links


Now that the Microsoft Build Conference has ended, you can now download a pre-beta copy of Windows 8.  As this is an early build of Windows 8, it is not recommended that you install this on a production machine as it might not be stable enough.  Also, some features in this build may not make it through to the final version of Windows 8.
To download windows 8 pre-beta, click on the relevant like below.  If you’ve installed the Windows 8 Build and need help or just want to discuss Windows 8 features, then you can do so below or in our new Windows 8 forum.

Windows 8 Developer Preview with developer tools English, 64-bit (x64)
 Windows 8 Pre Beta ISO Download Links

Download
Windows 8 Developer Preview English, 64-bit (x64)
 Windows 8 Pre Beta ISO Download Links

Download
Windows Developer Preview English, 32-bit (x86)
 Windows 8 Pre Beta ISO Download Links

Download

Kamis, 22 September 2011

Cara Memainkan Game Playstation 1 di Android

Babashafwandi.blogspot.com -Siapa disini yang menggunakan gadget atau tablet dengan sistem operasi android?? Nah, sudah tahu belum jika di android itu bisa memainkan game ps1? Penasaran kan? Cekidot,,

Untuk bisa memainkan game ps1 di android, kita membutuhkan sebuah aplikasi emulator game ps1 untuk android, disini saya menggunakan emulator yang bernama FPse For Android yang harganya kurang lebih sebasar $4, namun saya share remoxp Gratis!!. Hehehe

Cara bermain game ps1 di android :

  1. Install aplikasi emulator ps1 buat androidnya (FPse).
  2. Buat folder di SDCARD untuk menaruh game dan file bios, misal sdcard/GamePsx. Untuk memudahkan pembuatan folder dan manajeman aplikasi, file, dll anda bisa menggunakan aplikasi file manager ASTRO, ES File Explorer, dll. (Download di market).
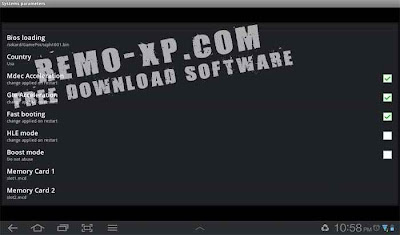
  3. Setelah aplikasi FPse diinstall, anda bisa menjalankan aplikasi emulator tersebut, kemudian melakukan setting bios.
  4. Masuk ke setting - system - Bios Loading
  5. Browsr file bios. Saya melatakan file bios di folder "GamePsx" dan lokasi di /sdcard/GamePsx.
  6. setting bios
  7. Bila sudah jangan lupa save, biar settingannya tidak berubah-ubah, dengan cara klik/touch menu Default Config Save (save as default config).
Selanjutnya anda tinggal browse game ps1 yang akan dimainkan. Untuk game ps1, silahkan download game ps1 yang sudah saya share sebelumnya, klik disini. PENTING : Pilih game yang format ISO/Bin jangan yang exe.

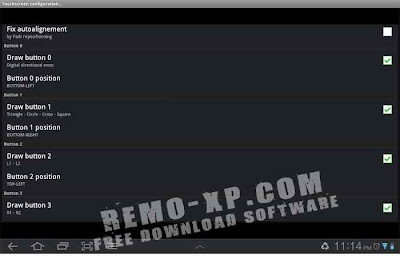
Untuk pengaturan stik, anda bisa masuk ke menu input ketika game sedang dimainkan, nanti tinggal di check aja tombol mana yang mau di tampilkan, dan kita juga bisa mengatur transparasi tombolnya.
setting stik
Jika sudah, jangan lupa disave pengaturan stiknya seperti yang sudah saya jelaskan caranya di atas.

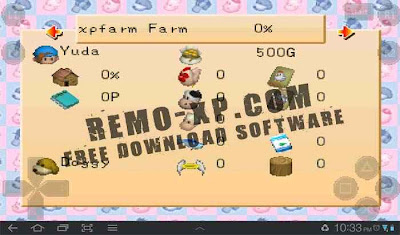
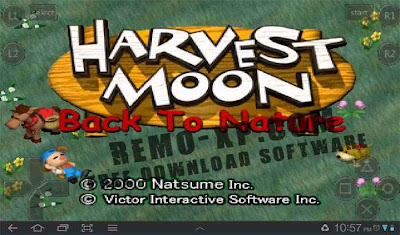
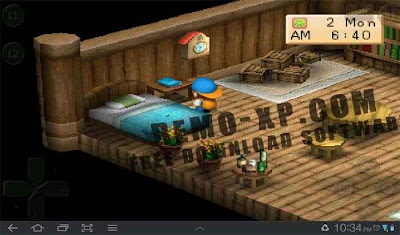
Saya sudah memainkan game Digimon World 1, Harvest Moon Back To Nature dan hasilnya tidak ada masalah, game berjalan dengan lancar.
harvest moon android
Info : Game bisa di save maupun load untuk melanjutkan permainan.

Password : www.remo-xp.com
Download Emulator PSX/PS1 For Android (FPse)
Download Bios For Emulator PS1 Android || Pasang Iklan Disini

Minggu, 12 Juni 2011

Kaspersky Internet Security 2012 Dan Kaspersky PURE

Assalamualaikum wr wb

Hai Sobat Blogger yang berbahagia

Sobat Blogger Tahu gak yang namanya Perusahaan Antivirus KASPERSKY LAB

1 Minggu Yang salu Perusahaan ini mengeluarkan 2 Produk Internet Security yang dinamakan

Kaspersky Internet Security 2012 Dan Kaspersky PURE Jika Sahabat blogger Ingin Mengunduh

Silahkan Lihat Tampilan KIS 2012 Di bawah ini

Screenshot (dari PC saya) :

Download :

Sementara ini saya belum nemu crack antiblacklist untuk kaspersky 2012 ini, nanti jika saya dapat akan segera saya uji coba dan saya share. Oke? Dan Key KIS 2012 ini akan saya usahakan Selalu Up To Date.

Berikut langkah Berikut Ini  untuk aktivasi KIS 2012 :

  • DISCONNECT DARI INTERNET / OFFLINE (Very Important)

How To Activate KIS 2012 - Offline Mode Key File


Kaspersky PURE

Kaspersky Pure memberikan anda lebih dari sekedar perangkat lunak antivirus. Ini semua yang anda butuhkan untuk melindungi semua aset yang paling penting dalam kehidupan digital Anda: komputer Anda, account online Anda, dan data Anda yang paling berharga. Ini memberi Anda ketenangan pikiran dalam kehidupan digital Anda secara aman, PC Anda aKan selalu dalam kondisi prima, informasi Anda yang paling berharga selalu dilindungi dari ancaman hacker. Kaspersky pure memerangi virus, malware, spyware, dan spam.

  • Free Download Kaspersky Pure Trial

    PERHATIAN!
    Untuk cara downloadnya Anda akan diarahkan ke adf.ly kemudian tunggu 5 detik dan cari tombol SKIP AD yang berada di sebelah kanan atas monitor anda.

    Cara Aktivasi Kaspersky Pure Menjadi Full Version

    01]. Jalankan Kaspersky PURE (installer)
    02]. Ikuti semua petunjuk penginstalan sesuaikan saja dengan defaultnya untuk penggunaan standar
    03]. Setelah menginstal, update sampai selesai dengan menggunakan masa trial 30 hari
    04]. Jika telah selesai update, buka K-PURE Pilih >> Settings >> Self-Defense >> Disable Self-Defense (hilangkan tanda centang) >> Apply dan OK.
    05]. Pilih “My Computer Protection” >> Pilih Settings >> Protection >> Disable Protection (hilangkan tanda centang) >> Apply dan OK
    06]. Restart komputer Anda
    07]. Buka K-PURE >> license manager (klik pada License terletak di kanan bagian bawah) Pada form baru akan keluar serial key masa aktif trial seperti CONTOH berikut “0123-0123MGM-XXXXXXXX”
    08]. Hapus key trial License tersebut dengan mengklik tombol warna merah bertanda “X” di samping key tersebut
    09]. Apabila ada peringatan penghapusan, pilih YES
    10]. Exit dari Kaspersky kemudian klik kanan pada ikon kaspersky yang terletak pada system tray juga.
    11]. Buka Activation Pure yang telah anda download (ektrak dengan winrar atau ultraISO)
    12]. Copy file “fltlib.dll” and “fltlib.ini” kemudian pindahkan pada direktori C:Program FilesKaspersky LabKaspersky PURE
    13]. Disable koneksi internet (buka RUN >> ncpa.cpl >> pilih Network >> klik kanan >> Disable)
    14. Buka K-PURE >> Klik pada License >> Activate commercial License >> masukkan 11111-11111-11111-1111X, kemudian klik “Next”. selanjutnya akan ada peringatan “It will be unable to connect to the Activation servers”. Klik “Browse” dan buka PURE.key kllik “Next”, kemudian “Finish”.
    15]. SELESAI dan Kaspersky PURE Anda sudah aktif sampai 2036 hari.

    Namun masih ada yang harus di setting seperti berikut:
    16]. Buka Kaspersky PURE >> klik pada “My computer Protection” >>
    Settings >> Threads and exclusions >> Exclisions >> Settings >> Exclusion Rules >> klik “ADD ” >> Pilih select object
    17]. Kemudian masukkan link file berikut
    C:Program FilesKaspersky LabKaspersky PUREfltlib.dll
    dan masukkan juga file berikut
    C:Program FilesKaspersky LabKaspersky PUREfltlib.ini
    Gunakan tombol browse untuk mencarinya
    18]. Klik OK untuk menambahkan kedua file patch tersebut ke exclusion list, klik Apply dan Ok pada Settings window
    19]. Jalankan kembali koneksi internetnya dan Enable Self-Defense juga Protection pada settings. lihat langkah 13 dan 04
    20]. Selesai

  • Senin, 14 Maret 2011

    Avast Antivirus Pro and Internet Security 5.1.889

    Nih Sobat BLog Ne Saya Kasih Software Security Yang Menurut Av-Comparatives.org

    Assalamualaikum Wr.Wb
    Setelah sekian lama saya nggak bloging
    sekarang babasXP akan Mempostingkan Software baru :

    1. Internet Download Manager 6.05 Build 3

    Internet Download Manager atau Lebih simplenya IDM adalah Software Untuk mempercepat
    Download Sobat Blogger
    Harga Software ini di site resminya hanya $49.99 Tetapi Di BabasXP Anda mendapatkannya secara Gratisss tisssss :)

    Nahhh yang berminat Nih.... Saya Kasih Linknya dan patchnya

    Internet Download Manager 6.05 Build 3

    Patch Internet Download Manager 6.05 Build 3
    Attention :

    Jangan di Update IDM nya karena IDM Dapat Mengalami Lisensi invalid.

    Twitter Delicious Facebook Digg Stumbleupon Favorites More